Yesterday I reinforced the edges of the pond by applying some mortar all around the outside edges. This seems to have done the trick – today they felt very solid. So today was the day for digging out the pond.
I decided that I would have two marginal shelves on the left and right as I looked at the pond from the kitchen window, and a gentle slope going from the near and far edges so that any visitors who don’t want to live in the pond permanently can get out. This left a section in the middle with a square cross section for me to dig out to a depth of 3 ft. So I got going.
I soon realised that while going to a 3 ft depth may be excellent from a pond ecology point of view, there were some substantial engineering and health and safety disadvantages. I made rapid progress up to about 1 foot because the soil is sandy and quite soft. After that, the rate of increase in depth of the hole slowed considerably. The deeper the hole gets, the harder it is to remove soil with a spade. I could have done with a soil removing tool like the one used by the man who replaced our lamp post last year. I began to entertain dark thoughts, such as whether my boss’s suggestion about the depth of the pond was nothing to do with the needs of the wildlife but was revenge for what I did to the academy XML census files last week. Eventually I stood in the hole and removed the subsoil in handfuls. I also had to consider what to do with the subsoil. I decided to put it in my empty bags of sand. I used 13 bags by the time I had finished. Fortunately my soil was well behaved and did not cave in. When the liner is in place, the weight of the water should hold the sides in place.
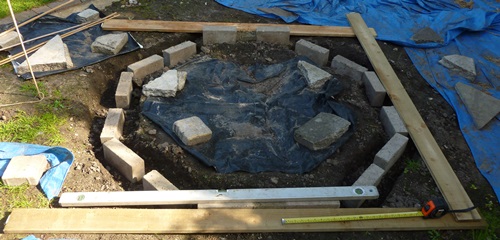
It was difficult to get the exposure right because it was quite a sunny day, but here is my best attempt at photographing the hole.
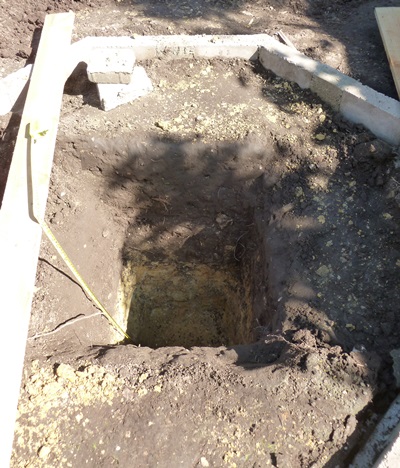
The hole
And the tape measure close up:
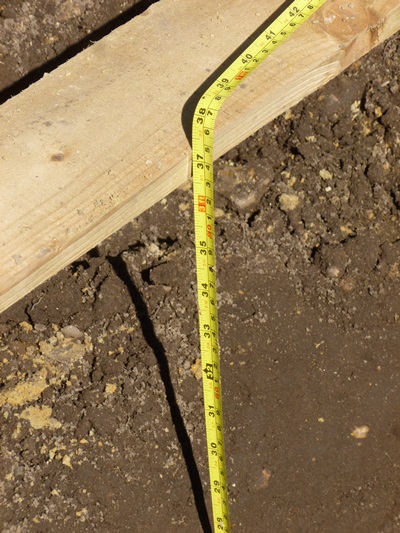
The depth of the hole
And here I am standing in it:
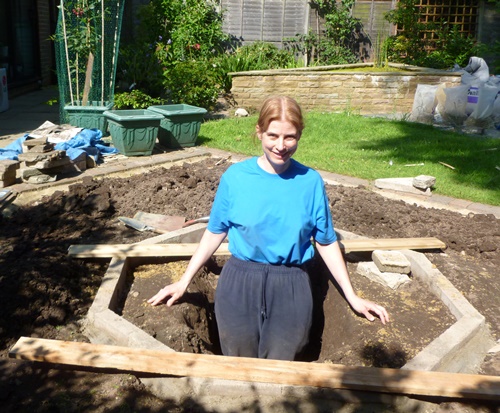
Standing in a 3 ft deep hole
If you are wondering how I managed to get the earth out of a hole of such a small cross-sectional area, I did it by repeatedly folding myself in half with straight legs and arms. I couldn’t crouch down to get the earth out because there wasn’t enough room. I decided that the blog would not be enhanced by the inclusion of a picture to demonstrate this technique. The two bits of crazy paving to the right are there in case I needed something to step onto in order to get out of the hole. Fortunately I didn’t have any trouble extricating myself.
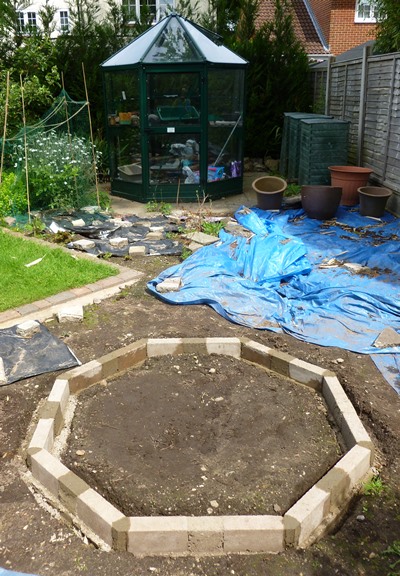
When I had finished, I put two square plastic planters in the hole, so it wouldn’t be full of cats and foxes the next morning, and took a final picture.

The pond dug out with marginal shelves and slopy bits
I still don’t know whether digging the pond so deep was a good idea or not. Although there are shallow edges, I am worried that animals might fall in the deep bit and drown. And when the time comes to clear out the pond, I will have to get a bucket on a rope and haul it up to remove all the water. But if it really doesn’t work, I can always lift out the pond liner and fill in the hole a bit. As for what to do about the subsoil, I have a cunning plan. I intend to mix it half and half with compost and put it into the lawn area. I think that overall that should be equivalent to top soil, and will mean that I don’t have to buy as much top soil when it’s finished.