Helen's Garden Renovation Project

Thursday 24 November 2011

Moving Day

Filed under: Apples,Progress — Helen @ 3:55 pm

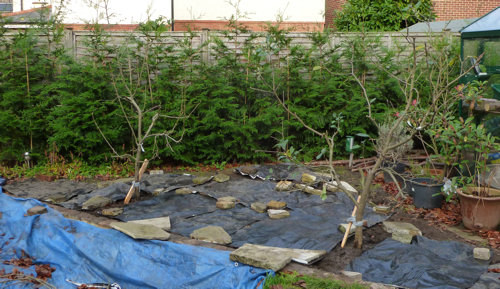
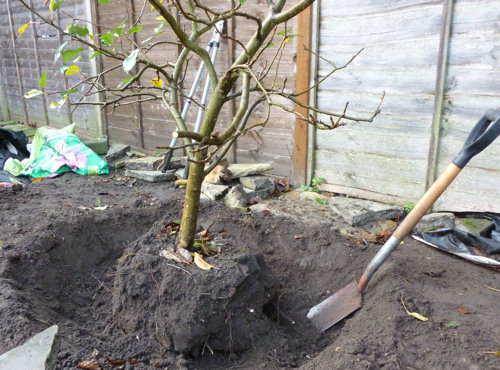
Today was a mild day with no rain forecast and I decided that now was the perfect opportunity to move the apple trees, even though they have not lost quite all their leaves. I moved Discovery first because it was nearer the destination holes than Charles Ross. First I dug a trench all round the tree.

Digging a trench around the tree

Digging a trench around the tree

Then I started shoving my spade under the root ball until the tree could be gently pushed over. I thought it would be heavy to lift, but it was very light. I tried to take as much earth with the roots as I could, but much of it fell off when I picked the tree up and carried it to the hole.

The Discovery tree, laid in its destination hole

The Discovery tree, laid in its destination hole

You can see that the root ball is quite small. I hammered a stake in at about 45 degrees like the books say you should, and tipped in two bags of organic compost as well as some soil, stamped it down and tied the tree to the stake with half a pair of old tights. The books say you should use rubber ties, but I should think tights would be just as good, and cheaper. The books also say that you should have the stake facing the prevailing wind, but I have no idea where the prevailing wind is. In my garden, things fall over in all directions. Neither do I know what they mean by positioning the stake into the prevailing wind. Do they mean that if the wind is coming from the north, the end of the stake that isn’t buried in the ground should be north of the end that is buried in the ground? Or the other way around? They don’t explain. So I decided to put the stake in at a direction that I thought would be aesthetically pleasing. One thing I am absolutely sure about, though, is that a stake is necessary. Compared with the Leylandii roots, the apple tree roots were pretty feeble.

Then I dug up Charles Ross and moved him too.

The apple trees, both planted in their new positions.

The apple trees, both planted in their new positions.

I ended up positioning both trees slightly to the right of where I had originally planned to put them. Charles Ross was a bit too close to the hedge. I also pruned them both a bit, but not very much. I am very pleased with how the trees look. My garden is beginning at last to look like a garden again.

But the side fence now looks very exposed.

The side fence, very bare

The side fence, very bare

Moving the apple trees was a lot easier than I thought it would be. I thought the roots would be harder to cut through and that I would have difficulty lifting the trees and carrying them to their destination. What was quite difficult was the planting. It is quite hard to hold an apple tree upright while shovelling soil into its hole. It is also difficult if you want to see what the apple tree looks like from the patio before you commit to planting it that way round. The easiest way to deal with the soil is to heap it up all around the hole, and then scrape it into the hole with the side of your foot, while holding the tree up. When enough soil is in there to keep the tree vertical, you can then nip off and take a look from a distance.

However, despite the task being easier than I thought, I am now suffering from an assortment of aches and pains and have taken some ibuprofen. I hope that I will be recovered enough next week to either lay some stepping stones, or plant something else.
\

Thursday 17 November 2011

Moving time approaches

Filed under: Apples,Progress — Helen @ 1:08 pm

The apple trees are close to losing all their leaves.

Apple trees with hardly any leaves left

Apple trees with hardly any leaves left

This means it is time to start the removal process. This means digging the destination holes first, as it is important (1) to find out if the earth contains any just cause or impediment why I should not plant the trees in it and (2) to plant each tree as soon as possible after it has been dug up to minimise the chance of the roots drying out, getting frozen etc. It is very lucky for the Garden Renovation Project that this is such a mild autumn, as it looks as if I will get in at least another month’s digging before there is any chance of the soil freezing hard.

So I dug two holes. I put two sticks in them to simulate apple tree trunks and see how they would look.

Two holes for the apple trees

Two holes for the apple trees

I think I may have put the trees too close together. I don’t want to move the leftmost tree any closer to the hedge, so I may move the rightmost hole a little to the right. I will think about this next week.

If you were wondering why I don’t plant the trees in a line parallel to the hedge, it is mainly because there is a soakaway between the rightmost hole and the hedge. Also it will be necessary to get access to the hedge in order to trim it, so I don’t want to plant two trees right next to it. So the apple trees have to go parallel to the lawn edge. I may raise up the earth a little behind the rightmost tree and plant some small winter colour plants like cyclamen or pansies. Next winter. When I’ve finished digging.

The pictures are courtesy of my new Panasonic Lumix FS35. As long as I manage not to drop it in the pond, I expect it to supply many more blog pictures over the life of the project.

\

Saturday 5 November 2011

Water, water everywhere

Filed under: Pond — Helen @ 4:10 pm

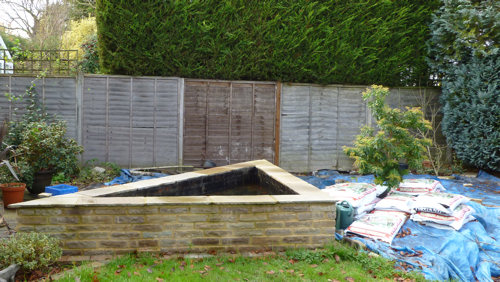
We are now having proper autumn, with lots of leaves and lots of rain. The shallow pond has filled up as far as it is going to, and my gamble over the mortar join did not pay off. This gamble was to paint over the mortar around the edge of the pond with Pondseal and hope that the join between the mortar and the liner was watertight. Well, it isn’t. This means that in spring, or whenever we get the next prolonged dry spell, I will have to drain the pond, chisel a neat edge to the mortar, clear out any gunk in the gap, and fill the gap with purpose-made sealant. I am not all that bothered about doing this because (a) I thought I probably would have to anyway and (b) I also want to put some cobbles around the sloping side and I will have to drain the pond before mortaring or glueing them in place.

I was slightly more disappointed to find that the repair of my second water butt has not worked. It is dripping steadily from the base of the strip that I stuck over the hole. However, the repair of the first water butt is still holding, and the repair of the second is still an improvement, as the second water butt joined to it has been able to fill to the brim, which never happened before because the water drained out of the first water butt too fast. I decided to stop the leak temporarily by emptying out all my water butts into the raised pond, which seems to be holding water nicely. The water is now about two inches above the marginal shelf. I estimate that this is about one-third full. By spring it should be completely full, no problem.

And the final disappointment is that my lovely Canon G9 camera has got an E18 lens error, which means that the lens won’t retract fully when the power is turned off. You would have thought that this would just mean it won’t fit in its case any more, not that it won’t take any more photographs, but unfortunately it won’t work any more. I have tried all the suggestions on the Internet except taking the camera to bits. In my experience, nothing good ever comes of taking things to bits.

\