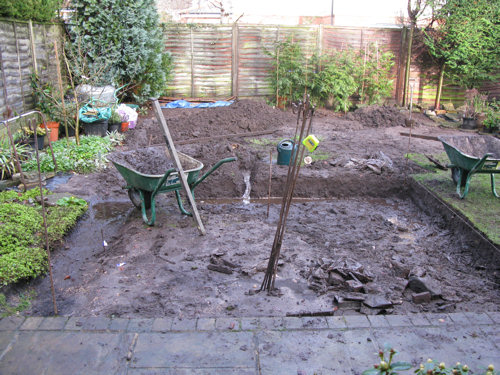
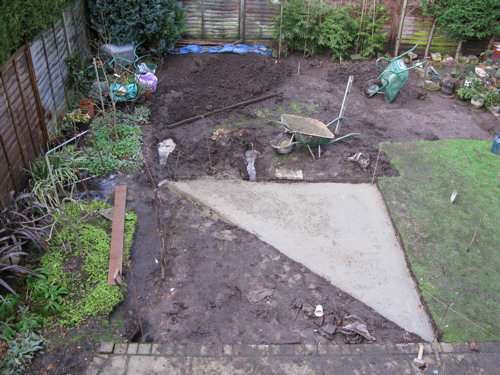
Helen's Garden Renovation Project

Sunday 30 January 2011

Pond and lawn revealed

Filed under: Progress — Helen @ 6:04 pm

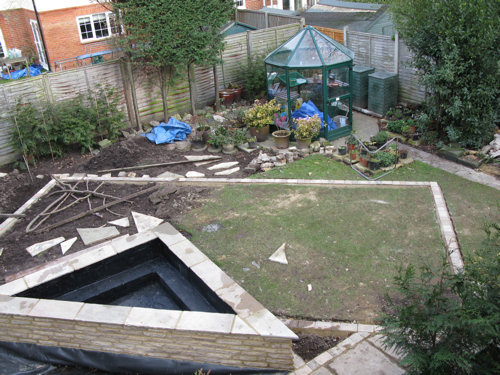
Today it was time for the covers to come off, and here is the finished result:

The ponds, seen from the left hand corner nearest the house

The ponds, seen from the left hand corner nearest the house

A puddle has already formed in the shallow pond, but the raised pond has no water in it because it has spent most of its time covered up with a tarpaulin.

The lawn viewed from the left hand corner nearest the house

The lawn viewed from the left hand corner nearest the house

I would have moved the paving slab on the lawn, but it was frozen stuck to the grass and I thought it best to leave it where it was for the time being.

The lawn as seen from the left hand corner furthest from the house

The lawn as seen from the left hand corner furthest from the house

As you can see, the pond has been finished with black waterproof paint. I had thought that a stone finish would look better, but Richard said he had tried that before and it didn’t look very good – you could see all the debris and dead animals in the pond. So I went with his judgement, and the pond looks very smart. I think that the mortar between the edging and the liner of the shallow pond needs sealing to prevent chemicals leaching out, but this should ideally not be done for another two weeks at least. I had a bottle of the stuff I used to repair the original pond some years ago, but it has driedĀ up now. I will get some more and put it on sometime in February. In the meantime, I can make a start on filling up the raised pond as soon as the rain fills up my water butts. (We had to drain some of the water butts because they were leaking and they would have interfered with the setting of the grouting. I am less impressed with water butts than I used to be because three out of four of them now leak and, given their cost and how long they last before starting to leak, I am not sure they make economic sense).

There is only one thing that I have asked the landscapers to change – the last block of the edging of the shallow pond on the line going directly away from the house has been slightly displaced. It’s not very noticeable on the photograph shown above, taken from an upstairs window, but it does show when I look out of the patio doors at the garden. I think this is deliberate, to allow for an overflow channel for the shallow pond. But I don’t think a ground-level pond needs an overflow channel. I think the water will work out for itself what to do if there is too much of it. And anyway, there will still be a gap if the block is moved into alignment with the others.

So now I am continuing to work out what to do with the plants. You can see from the pictures that I have put the rubble to use as stepping stones. I need to get the soil redistributed and either cover up the bare earth or plant it before the weeds start going, which will be sometime in March, depending on how crisp our spring is this year. Fortunately it is quite cold and dry at the moment, which is ideal for shovelling soil about.

\

Thursday 27 January 2011

Finishing up

Filed under: Progress — Helen @ 3:59 pm

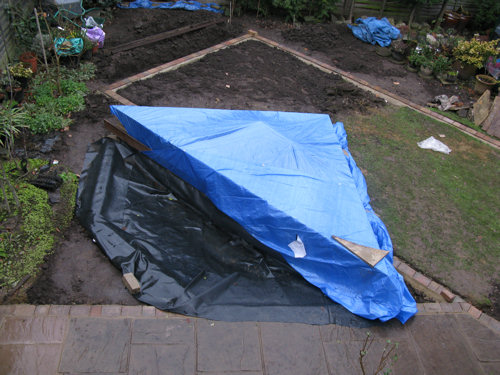
The pond and edging are nearly finished, but I still can’t show you a good picture of the pond, because it has been wrapped up in a tarpaulin to keep the rain out while the inside is being concrete-washed and waterproofed.

Pond covered with blue tarpaulin to keep the rain off

Pond covered with blue tarpaulin to keep the rain off

I have been spending a lot of time while out walking or on my bike thinking about how to arrange the rest of the garden and what to do next. The fundamental questions are:

(1) Shall I move both the apple trees, or just one, or none?
(2) Where am I going to plant my three blackberries?
(3) What sort of path do I want to the greenhouse and compost bins?
(4) Where am I going to grow my vegetables, and how do I separate them into beds so I have easy access?
(5) Shall I finish taking up the path that runs along the left-hand fence, or shall I leave some of it there?

I have not yet worked out answers to all of these questions, but have had some ideas so far.

The main all-weather access required has to be to the compost bins. It doesn’t matter so much if there isn’t a path directly to the greenhouse. I could have a path running parallel to the right-hand fence and about three feet from it. Here is a picture borrowed from a previous post:

The bay tree from http://www.helenpercy.com/gardeningblog/2009/09/06/and-now-it-is-autumn/

The bay tree from http://www.helenpercy.com/gardeningblog/2009/09/06/and-now-it-is-autumn/

The path would run straight through the temporary pond and the bay tree. I would remove the crazy paving path that currently runs about six feet to the left of the fence, and then use the space for planting and the new version of the temporary pond. (I have decided that I like having a pond visible from the kitchen window, and although I know that having three ponds in a 40 ft square garden is a bit mad, I don’t care. Anyway, it will only be a small one). This is very sad for the bay tree, which is a magnificent plant, but it is a bit big. I have a smaller one in a pot, and will plant it nearer the house for easy leaf-picking, and will keep it a lot smaller.

I have also thought that I could have a set of three or four posts running along the new path, either to the left or the right, for growing the blackberries. Another option is to grow the blackberries along the fence but it may make it hard to get at the ivy and I think I may prefer something more substantial there, to help hide the compost bins.

I haven’t yet come to a decision about the apple trees, but they could go in the vegetable growing area, behind the long edge of the lawn. I have also thought it would be nice to have a line of bedding plants and/or bulbs behind the long edge of the lawn so there would be something pretty to look at all through the year. The courgettes and other vegetables could grow behind them.

There is a strip of garden behind the greenhouse which should still get some light through the greenhouse. I may try growing runner beans there. One reason for this idea is that the plot would be bare from October to May, and therefore there would be nothing in the way when the thuja hedge gets enormous and needs annual trimming.

So I have spent a couple of hours today taking bits off the bay tree and the Leylandii and doing a bit of soil moving. To save on costs, I stipulated that no waste should be removed from my garden after the works, and therefore I have a good selection of bits of paving, which I have started using as stepping stones to cut down on the mud transfer rate. While I am cutting up and shredding the branches, I can continue to think about what will go where. I think it will take me about two years to sort this out, and then I can get the final hard landscaping done.

\

Friday 21 January 2011

Day Four

Filed under: Progress — Helen @ 5:00 pm

This morning it was again a little less cold – above freezing again at 1C. There was a little drizzle when I went to get the papers, and the roads were damp as if it had been drizzling overnight. The sunrise was a bit red, but I hoped that it didn’t mean it. Fortunately the rain had stopped by the time it got light, at about eight o’clock, and later on there was even sunshine.

This picture shows where the project got to yesterday, in better lighting.

The shallow pond, shaped and reinforced with concrete

The shallow pond, shaped and reinforced with concrete

The first job was to build up the inner wall of the pond. There was also plenty of grouting to be done.

Raised pond with most of the inner wall built up

Raised pond with most of the inner wall built up

I’d asked the landscaping company to replace two damaged fence panels while they were at it. This is not really Renovation but Maintenance, but had to be done. The fence is made of slotted concrete posts, so in theory, old panels can be slotted out and new panels slotted in, but this only works if the surrounding plants have not pushed out the posts. Mike had to attach a spare batten to make the fence panel stay where it was put, and it was not possible to move down the concrete gravelboard on the panel opposite because the fence was so overgrown with ivy (from the other side). Another annoying thing is that fence panels now come in a different size. WHY DO THEY HAVE TO DO THIS? Still, I am not really bothered because the most important thing is for the fence to be stable and functional, and it is.

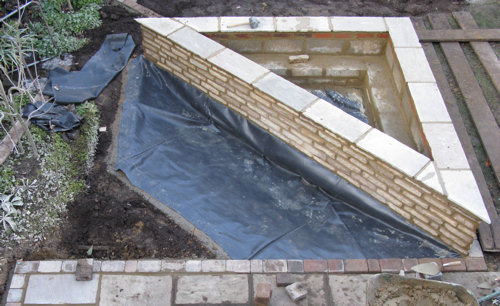
The next thing was to lay the pond liner for the shallow pond. This was not easy because of its shape. A layer of sand was laid, and then a few bits of spare liner were put over the sand to provide some extra cushioning. The liner at the long straight edge was slotted into the wall of the raised pond, just above the engineering bricks. This was done by chiselling out the mortar. To hold the liner in place while re-mortaring, you shove in bits of cardboard. Mike said the liner was held in by small bits of stone shoved into the joint – mortar alone wouldn’t have held it.

Then the coping was laid on the top of the raised pond. Note there are two very sharp corners. I shall have to watch those and if I get too many bruises, I’ll have to grow some very soft plants around them.

The raised pond with the coping finished

The raised pond with the coping finished

Here is a picture of the entire construction.

The whole construction at 3 p.m. on the fourth day

The whole construction at 3 p.m. on the fourth day

About an hour after this picture was taken, I looked out of the window and wondered what was supposed to happen with the left hand edge of the shallow pond, as you look from the house, so I got the plan out, and realised to my horror that the edging had taken a wrong turning! The problem was at the right hand edge of the raised pond – instead of coming in at right angles to the patio, it was supposed to turn off and meet the patio at 45 degrees. I rushed out and said those dreaded words, “I’m sorry, but I think you’ve done it wrong.” Fortunately, it was quick to put it right. We decided to keep the edging that was running along the entire length of the right hand side of the raised pond since it made the triangle isosceles. We could have kept the line as it was, but I thought the lawn would look odd – instead of being a rectangle with a triangle cut out of it, it would be a rectangle with a triangle cut out of it and another triangle added onto it. The triangular bed that the three edges have made is very small, but I have decided which plant will go in there. It will be the dwarf rhododendron that my neighbours Nick and Mel kindly gave me when Dave died. It will flower at about the time of his death every year, if it keeps good time, and it will be right next to the pond, which is exactly where Dave would have spent the most time if he had lived to see the completion of my garden.

The light has gone, and so have the landscapers. They will be back tomorrow for a bit of finishing up, but now the covers are on the newly concreted and mortared structures, and it’s time for a rest. You might think that I have no right to feel tired, and I would agree with you, but at the start of this I really didn’t know whether I would love or hate the implemented design, and it has been such a long time in the planning. Richard said, before starting the project, that it would look amazing. I don’t know whether he says that to everybody, but on this occasion he was right. It does look amazing.

\

Thursday 20 January 2011

Day Three

Filed under: Progress — Helen @ 5:26 pm

It was not as cold this morning as yesterday morning: just above freezing at 0.2C. Today the main job was to get the liner and marginal shelf put in the raised pond. The method was to put the liner in first, and then build up the inside of the pond with blocks, odd bits of rubble and concrete. This means that very little liner will show at the end.

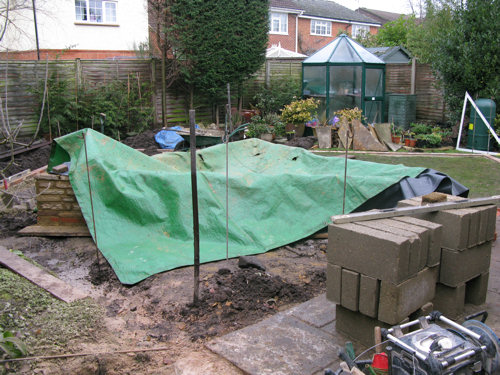
Richard chiselled out a hollow in the middle of the pond, making the maximum depth about 60 cm. This is to provide some protection for the inhabitants against extreme cold. I am not currently planning to put any fish in the pond, but I may do so later. Then he put in the liner. Then it started raining, despite the fact that it had been told not to do this by the Met Office. This is why my photograph has a tarpaulin over the pond.

The pond liner is put in place - just as it starts raining

The pond liner is put in place - just as it starts raining

Richard then started on the marginal shelf, which I had estimated needed to be 20 cm below the water surface. But I realised I hadn’t checked this, and I put a probe into the temporary pond to see how deep its shelf was, which I think is about the right height. It was about 24 – 27 cm. So the marginal shelf needed to be deeper, especially allowing for the fact that the water level will not always be at its maximum. I can always put pots on bricks if they are too low down, but can’t do anything about it if they are too high up. So we managed to do a slight change of plan, which will make the marginal shelf about 27 cm below the surface, which will do nicely.

Marginal shelf in raised pond

Marginal shelf in raised pond

The edging for the lawn is now almost complete. As I expected, it had to be raised quite a bit above ground level at the back, but this was mainly because there was a big dip in that area. There will need to be a slight slope down towards the back fence, but nothing too dramatic. The main thing was to get the lawn flat as I don’t think it would have looked nearly as nice if it had been sloping.

In my final photograph, taken as the light was fading, you can see the shallow, ground-level pond has now been dug out. It’s difficult to see the depth from the photograph, but the deepest area is right next to the diagonal of the raised pond. There is a gentle slope from this flat, deep area, leading to the edge in all directions. Plants can be stood on the deepest area. Using Pythagoras, I was able to calculate that each of the three short sides needed to be 1.76 cm to make them all the same length. This worked on the ground as well as on paper. In this picture you may also be able to see that the soil from the shallow pond has been put to good use building up the ground level around the lawn edging.

The shallow pond has been dug out

The shallow pond has been dug out

Richard and Mike think that I should not dig over the lawn, because the rubble in it provides good drainage. Maybe that is true, but I may dig it over anyway because I don’t think it’s in very good health, whatever the reason. But for now I will put my tarpaulins over the soil and mow the existing grass as normal, because it’s more important to work on the rest of the garden first. I am already formulating a plan in my head, which I shall write in this blog, and then totally ignore, as usual.

\

Wednesday 19 January 2011

Day Two

Filed under: Progress — Helen @ 8:25 pm

This morning was a frosty one. It was -1.3C when I went to get the papers, and it took a while to get above freezing. Fortunately the concrete base was not bovvered. A layer of engineering bricks, which are unexciting apart from the fact that they have holes in them, was laid first. There is probably a really good reason for doing this. The tops of the bricks are level with the surface of the patio, so they won’t be seen when the earth is put back.

A row of engineering bricks to start the pond off

A row of engineering bricks to start the pond off

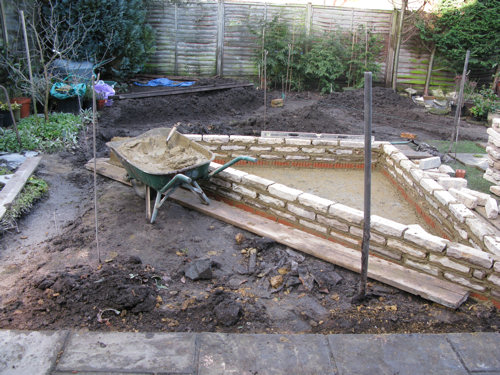
The walling blocks for the pond took a while to arrive. Kebur, our local supplier, was very busy today because the sun came out yesterday so lots of people wanted to do things to their gardens. This is what the pond looked like when it was about half built.

Three courses of the pond

Three courses of the pond

Meanwhile, the edging for the lawn has been progressing.

New patio edging and the start of the lawn edging

New patio edging and the start of the lawn edging

At the end of the day, Richard had laid six courses of bricks and Mike had got to the end of the right-hand long side of the lawn edging, but I couldn’t take any pictures because they wrapped it up in cloths and tarpaulins to keep it all nice and warm through the night. One of my blue tarpaulins came in useful because there was such a lot to cover.

Already I can see that the illusion is working. I am not sure how well it will work when looking out through a window, but when you come round the corner after walking down the side passage, you just have to look along the length of the lawn, and the garden really does look longer. Squaring off the edging of the patio really works well. Although I loved the curves, the straight lines look just right with all the rest of the design. I am beginning to think about how I will do the planting. There are bound to be too many plants for the space available, but I can put them in their pots in the places where I think they should go and see how that works. I can hardly wait.

\

Tuesday 18 January 2011

The works begin

Filed under: Progress — Helen @ 7:36 pm

Yesterday it rained and rained and rained. It then stopped raining, but the garden was very soggy, so no work could take place. Unfortunately, it then rained in the evening and overnight. But first thing this morning there was no rain, and the forecast is for a settled few days ahead, so the works began.

This is the plan for the works, correct as of Tuesday 18 January, 0800 hours.

Plan of garden works

Plan of garden works

The big diagonal rectangle is the lawn, and the triangle cutting into it is the raised pond. The area at the bottom of the diagram is the patio.

First, my landscaping company measured out a right-angled isosceles triangle for the pond, and dug it out. They had to put in a couple of drainage channels because it was so boggy.

Area for the pond dug out

The area for the pond has been dug out

Then they filled it with a dry base to soak up some of the water, and then poured in some nice concrete.

Concrete base for raised pond

Concrete base for raised pond

And then we worked out what to do about the patio reshaping. The patio had curves, and these needed to be made into straight lines so that they matched the rest of the plan. Yvonne, the garden designer, had made all the straight lines parallel to or perpendicular to the house. But Mike (from the landscaping company) suggested using diagonal lines to help draw the eye along the diagonal lawn and thus enhancing the illusion of length. We played around with bits from the raspberry frame (what a good thing it was that I didn’t get rid of the 10-foot cross pieces) and eventually came to a decision. And this is what it looks like.

Patio reshaping progress

This picture is taken looking towards the right of the patio, so the house was on my right and the new pond was on my left when I took it. One corner of the lawn will fit into the cut-out triangle – this is what we had in the original plan. But instead of joining the triangle to an edge that runs parallel to the house, it is now joined to an edge that runs parallel to the new lawn. At each far side of the patio there will be a rectangle cut out that will frame an evergreen plant: the camellia on the right (as you look from the house) and the elaeagnus on the left. I like this new arrangement because it is simple and doesn’t have any what Mike called pinch points; i.e. there aren’t any bits where the patio gets too narrow as you walk from the right side of the garden to the pond.

So I would say this has been a very good start to this stage of the project. It is definitely best not to be too rigid about a plan, but to discuss it with the people doing the work. They may even be more knowledgeable than garden designers because they always see the results of the plan and can tell (even if they don’t say) whether it is any good or not.

\

Sunday 16 January 2011

The covers are off!

Filed under: Progress — Helen @ 2:54 pm

We had the coldest December since Decembers were invented. I did a little bit of tidying up occasionally, but I couldn’t do much because my fingers would freeze, even with gardening gloves. In contrast, January has turned out to be very warm, with temperatures of as much as 11C sometimes.

But never mind about that. The important thing is that building work starts tomorrow, weather and other circumstances permitting. So yesterday I went out and cleared the patio, pushing the trees and shrubs back towards the house to allow as much room as possible. I also cleared up a lot of leaves and made another attempt to scrub some of the green slime off the patio. (I did this a few days ago because the patio was so slippery it was getting really dangerous).

Clear patio ready for reshaping

Clear patio ready for reshaping

And today I went out and brushed the remaining leaves off the tarpaulins. I folded two of them up and put them in the greenhouse so they would be out of the way. I folded most of the third one up and left in in place in front of the back fence. You can see there are still quite a lot of weeds, even though I have pulled a lot of them up already. I pulled up the weeds that were along the line where the lawn edging will be laid, to stop them getting everywhere.


The garden without the tarpaulins - view 1

The garden without the tarpaulins - view 1

This view shows a bit more of the area to be landscaped, but the perspective is a bit funny.

The garden without the tarpaulins - view 2

The garden without the tarpaulins - view 2

This is going to be a good test of the cat repellers. Although I haven’t seen many cats in my garden, they have managed to foul the earth under the newly planted thujas. Most of the rest of the garden has been useless to them because it has been covered up. The garden is now a gigantic potential cat toilet, and I hope that the cat repellers manage to keep the cats off it.

It is very exciting to think that I am at last getting the main part of the work done. It’s a bit scary too. It’s not just the expense – it’s the fact that if I hate it, it would be very expensive to undo. And I cannot tell whether I am going to like it until it’s done. On the other hand, it does have the advantage of being a garden. So if I think it looks awful, I can just fill it up with very tall trees and then I won’t be able to see any of it.

\