Helen's Garden Renovation Project

Thursday 12 January 2012

Planting the magnolia

Filed under: Magnolia,Progress — Helen @ 3:58 pm

I haven’t made any progress for a while because it keeps either being windy or being about to get windy. Today it was slightly windy, but I decided that I was fed up with not planting the magnolia and today I wanted to plant it. There is only one place in the garden where there might possibly be enough room for it, and so I put it there.

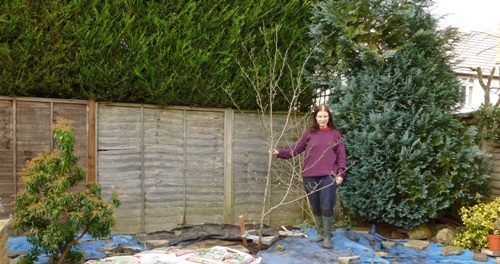
The magnolia and me

The magnolia and me

I really struggled to get the magnolia out of its pot. I used gravity by resting the pot on top of a pile of compost bags and pointing the plant at the ground; I used a trowel to dig around the inside of the pot; I even used a hammer and chisel to get a bit deeper than a trowel could go. I thought I would have to saw through the pot, which I didn’t want to do because it is a nice pot. Eventually, after losing quite a lot of soil from its roots and more than a few flower buds, the plant came out.

I have grave doubts about whether it is a good idea to plant a magnolia in such a restricted space, but I think it will be OK there for another five years at least. And although magnolias don’t like being pruned, it doesn’t seem to kill them. So I have made my decision, and we will see how the arrangement develops.

\

Thursday 22 December 2011

Planting the pieris

Filed under: Progress — Helen @ 2:43 pm

The raised pond is getting fuller, and it won’t be long before the water level reaches the overflow pipe. The water will drain onto a patch of earth behind the pond. My plan was to plant the pieris there, since it likes damp conditions and it is evergreen, so will still be using some water in the winter.

I dug a deep hole – nearly two feet deep at its deepest – and tipped into it my vast stone collection, amassed while digging the garden over a number of years. This made a mini soakaway to help with the drainage.

Hole with layer of stones

Hole with layer of stones

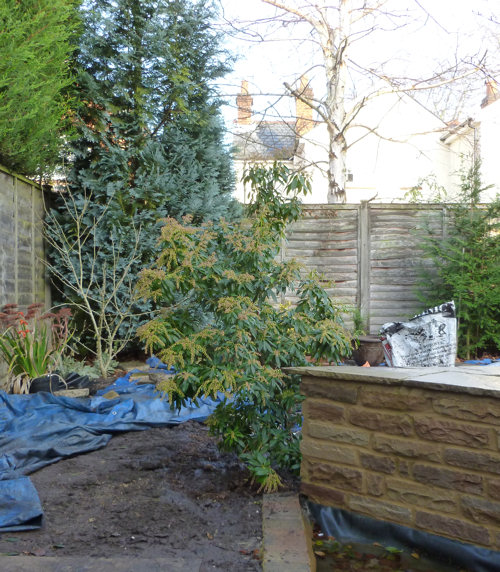
Then I filled it up to a depth of 12 inches with earth and compost and stuck the pieris in it, then filled the hole up to the top. I planted the pieris about an inch below the level of the edging blocks because I want a slight dip in this area, so the water run-off from the pond does not go all over the place.

This is what the pieris looks like from the patio.

Pieris planted at the corner of the pond

Pieris planted at the corner of the pond

At the moment it does not quite prevent the very pointy corner of the pond from having an accidental encounter with my leg, but when it grows bigger, it will.

This is the view of the pieris from the side of the pond. You can see (I hope) that the water level is now very close to the top.

I have put bits of paving slab around the pieris to deter weeds and cats, but I really need some ground cover plants that like damp shade to go there. Fortunately my RHS “Plants for Places” book has some attractive suggestions.

\

Thursday 8 December 2011

Establishing the routes

Filed under: Progress — Helen @ 1:18 pm

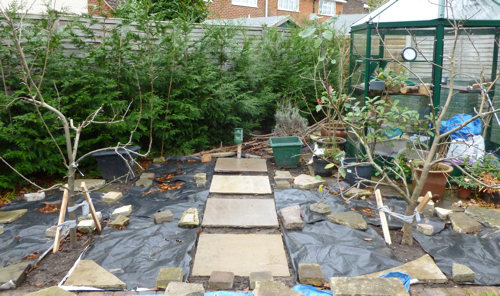
I have now positioned seven of the ten paving slabs that I plan to use for stepping stones. Last week I put four between the apple trees.

Path of stepping stones running between the apple trees

Path of stepping stones running between the apple trees


The day after planting the apple trees, I decided to give them an extra stake each because strong winds were forecast. Today we have a red weather warning for storms in Scotland, and it’s pretty breezy here. I think the extra stake was a good move. In due course I will remove one of the stakes. Maybe. If I remember. I will also find something more attractive to put at the end of the path than one of my cat repellers.

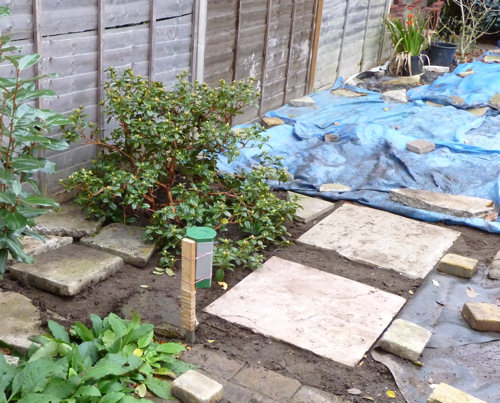
I have also laid three stepping stones running up the side of the shallow pond. I planted the rhododendron to the left of the stepping stones. The rhododendron has grown enormous and it was very difficult to plant because its branches are so low down. After putting it in the hole I thought, sadly, that I would have to prune it.

Rhododendron being planted

Rhododendron being planted

But then I decided that I didn’t have to prune it very much. I just took off some crossing branches and trimmed the ends, and removed any stems I had broken while planting. Maybe I’ll take some more off after it has finished flowering in February. I have left plenty of room between it and the Elaeagnus because the Elaeagnus will grow much, much bigger, and I wouldn’t be surprised if the rhododendron did too.

Rhododendron after pruning

Rhododendron after pruning

Some time in the future I am going to have to decide what to do about the stepping stones in the long term. I have laid them straight onto soil, and used a spirit level to make sure they are roughly level and at the right height. I have lined them up by eye, not with poles and string. I think I would like to get in a professional to lay them properly on mortar and make sure they are nicely lined up, but if I do that, I will have to delay planting around the stones until that has been done, or the plants will only get in the way. It is not easy laying paving stones, especially when they turn out to not be exact squares and the surface is irregular.I think it will be essential to grow lots of plants in between them to hide any imperfections in their positioning.

You may think the slabs look too close together. I have positioned them 18 cm apart, which means that the distance between them matches my stride length. They would probably look better if I moved them further apart, and I would not need so many of them, but they would not be as comfortable.

I will not extend my line of three paving slabs any further in the same direction. The reason is that the pond has a very sharp corner which I don’t want to be tempted to walk into. I will divert the path off to the left, and plant something next to the sharp corner to make it very difficult for anyone to get near it. I may need extra stepping stones, but they don’t have to all be the same type.

So now I have nearly finished establishing my routes, and the apple trees and the rhododendron can get on with establishing their roots.

\

Thursday 24 November 2011

Moving Day

Filed under: Apples,Progress — Helen @ 3:55 pm

Today was a mild day with no rain forecast and I decided that now was the perfect opportunity to move the apple trees, even though they have not lost quite all their leaves. I moved Discovery first because it was nearer the destination holes than Charles Ross. First I dug a trench all round the tree.
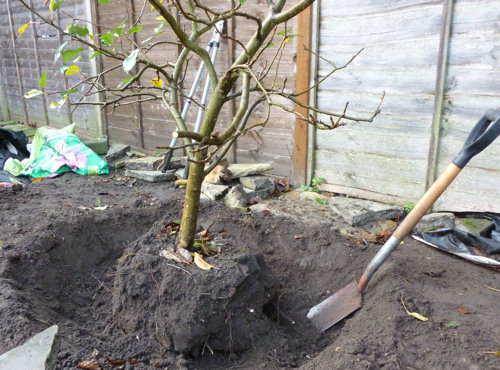
Digging a trench around the tree

Digging a trench around the tree

Then I started shoving my spade under the root ball until the tree could be gently pushed over. I thought it would be heavy to lift, but it was very light. I tried to take as much earth with the roots as I could, but much of it fell off when I picked the tree up and carried it to the hole.

The Discovery tree, laid in its destination hole

The Discovery tree, laid in its destination hole

You can see that the root ball is quite small. I hammered a stake in at about 45 degrees like the books say you should, and tipped in two bags of organic compost as well as some soil, stamped it down and tied the tree to the stake with half a pair of old tights. The books say you should use rubber ties, but I should think tights would be just as good, and cheaper. The books also say that you should have the stake facing the prevailing wind, but I have no idea where the prevailing wind is. In my garden, things fall over in all directions. Neither do I know what they mean by positioning the stake into the prevailing wind. Do they mean that if the wind is coming from the north, the end of the stake that isn’t buried in the ground should be north of the end that is buried in the ground? Or the other way around? They don’t explain. So I decided to put the stake in at a direction that I thought would be aesthetically pleasing. One thing I am absolutely sure about, though, is that a stake is necessary. Compared with the Leylandii roots, the apple tree roots were pretty feeble.

Then I dug up Charles Ross and moved him too.
The apple trees, both planted in their new positions.

The apple trees, both planted in their new positions.

I ended up positioning both trees slightly to the right of where I had originally planned to put them. Charles Ross was a bit too close to the hedge. I also pruned them both a bit, but not very much. I am very pleased with how the trees look. My garden is beginning at last to look like a garden again.

But the side fence now looks very exposed.
The side fence, very bare

The side fence, very bare

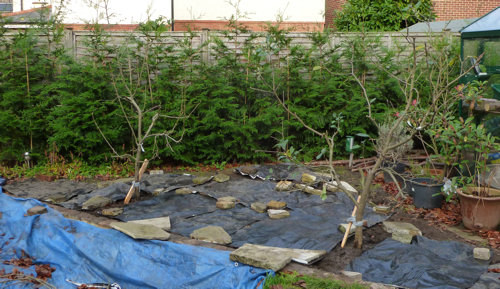
Moving the apple trees was a lot easier than I thought it would be. I thought the roots would be harder to cut through and that I would have difficulty lifting the trees and carrying them to their destination. What was quite difficult was the planting. It is quite hard to hold an apple tree upright while shovelling soil into its hole. It is also difficult if you want to see what the apple tree looks like from the patio before you commit to planting it that way round. The easiest way to deal with the soil is to heap it up all around the hole, and then scrape it into the hole with the side of your foot, while holding the tree up. When enough soil is in there to keep the tree vertical, you can then nip off and take a look from a distance.

However, despite the task being easier than I thought, I am now suffering from an assortment of aches and pains and have taken some ibuprofen. I hope that I will be recovered enough next week to either lay some stepping stones, or plant something else.
\

Thursday 17 November 2011

Moving time approaches

Filed under: Apples,Progress — Helen @ 1:08 pm

The apple trees are close to losing all their leaves.

Apple trees with hardly any leaves left

Apple trees with hardly any leaves left

This means it is time to start the removal process. This means digging the destination holes first, as it is important (1) to find out if the earth contains any just cause or impediment why I should not plant the trees in it and (2) to plant each tree as soon as possible after it has been dug up to minimise the chance of the roots drying out, getting frozen etc. It is very lucky for the Garden Renovation Project that this is such a mild autumn, as it looks as if I will get in at least another month’s digging before there is any chance of the soil freezing hard.

So I dug two holes. I put two sticks in them to simulate apple tree trunks and see how they would look.

Two holes for the apple trees

Two holes for the apple trees

I think I may have put the trees too close together. I don’t want to move the leftmost tree any closer to the hedge, so I may move the rightmost hole a little to the right. I will think about this next week.

If you were wondering why I don’t plant the trees in a line parallel to the hedge, it is mainly because there is a soakaway between the rightmost hole and the hedge. Also it will be necessary to get access to the hedge in order to trim it, so I don’t want to plant two trees right next to it. So the apple trees have to go parallel to the lawn edge. I may raise up the earth a little behind the rightmost tree and plant some small winter colour plants like cyclamen or pansies. Next winter. When I’ve finished digging.

The pictures are courtesy of my new Panasonic Lumix FS35. As long as I manage not to drop it in the pond, I expect it to supply many more blog pictures over the life of the project.

\

Monday 31 October 2011

Coronzilla

Filed under: Progress — Helen @ 12:19 pm

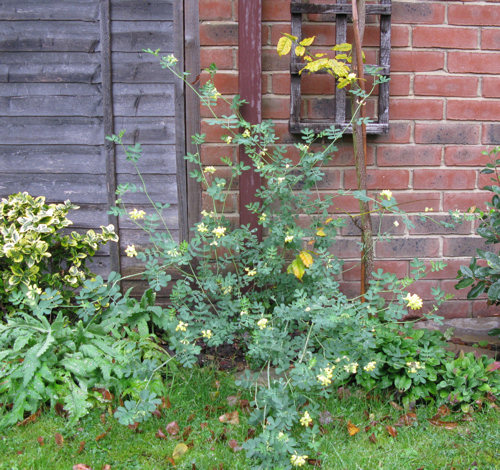
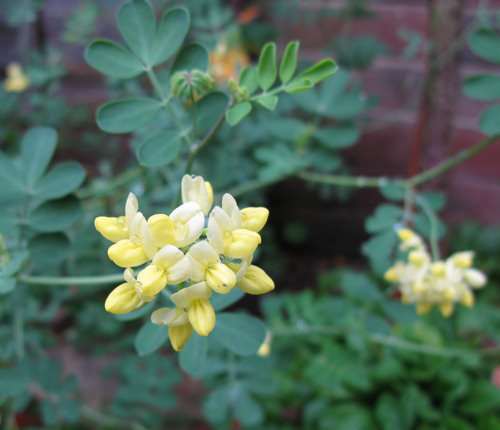
The Coronilla seems to like being planted against my house wall.

Coronilla grown big and with takeover ambitions

Coronilla grown big and with takeover ambitions

The reason I have a Coronilla is that Burncoose Nurseries accidentally sent me three when I ordered something else, and didn’t want them back. I gave away two of them, and planted the third against my house wall because it is very sunny there and that is what it is supposed to like. I got it in January this year, after the freezing cold December last year, and so I don’t know how it will do if we have a very harsh winter again. But for now, here is a close-up of some of its flowers.

Coronilla flowers close up

Coronilla flowers close up

I have dug a hole in the marjoram patch and put Alice Hoffman in it, as I am worried about her getting cold. Although she is a hardy fuchsia, there’s a difference between being hardy in the ground and hardy in the pot. All my other plants have survived two severe winters so I am reasonably confident that they will get through whatever this winter throws at them.

The apple trees have lost only a very few leaves. Some of them are going yellow, more on Charles Ross than on Discovery. I reckon three weeks should do it.

While waiting for the apple trees, I went to Wisley last Friday. Here is a picture of a Euonymus alatus, otherwise known as a Winged Spindle or a Burning Bush. I wonder if I can find the space to squeeze one of these in.

Euonymus alatus or Burning Bush

Euonymus alatus or Burning Bush

\

Thursday 13 October 2011

Synoptic Situation

Filed under: Apples,Conifers,Pond,Progress — Helen @ 7:48 pm

And now I am stalking the apple trees, ready to pounce the minute they go to sleep. While I am waiting, this is a good time to take stock of what I have achieved so far.

Overview at the end of the growing season for 2011, left hand side

Overview at the end of the growing season for 2011, left hand side

The hedge at the back is now about two feet taller than the fence at its highest point. I expect it to have grown another two feet by this time next year, and of course it should also thicken out considerably.

Behind the pond are stacked 20 bags of organic compost from The Compost Centre, ready for my autumn/winter planting. If you are wondering why I have put them around the Pieris, it is because the Pieris is a big plant in a lightweight pot, and it keeps getting blown over. The compost should put a stop to that.

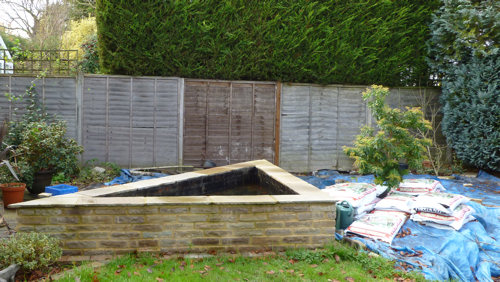
The raised pond still contains only a dribble of water. This is because it has hardly rained at all since I painted it. The shallow pond also contains only a dribble of water. This is because I gave it a thorough cleaning after painting the render around the edge, so I could remove all loose bits of mortar and mortar dust. This involved also removing all the water that was in there at the time, in case it had lime in it.

Overview at the end of the growing season for 2011, right hand side

Overview at the end of the growing season for 2011, right hand side

Over to the right hand side of the garden, the lawn looks surprisingly verdant, as if it hopes that I will decide it would be a shame to dig it up and re-seed it. Nice try, lawn.

And the apple trees are still very leafy. My current estimate of digging up time is about a month from now, so 13th November.

\

Friday 2 September 2011

Water butt repair

Filed under: Progress — Helen @ 2:33 pm

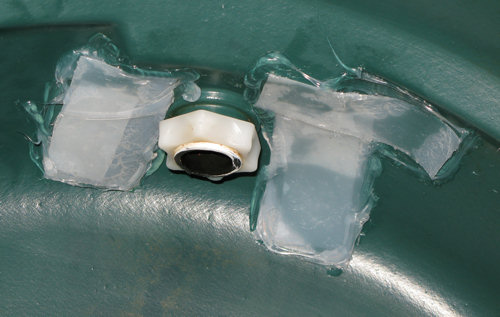
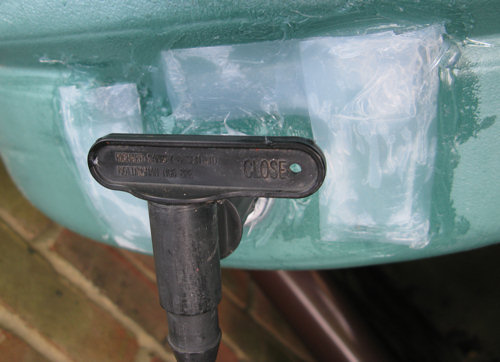
This week has been fine and dry, and the forecast for today and tomorrow is the same, so I decided it was time to try repairing one of my water butts. If it works, I will do the other one that is leaking. I took the advice at http://www.growfruitandveg.co.uk/grapevine/top-tips/water-butt-repair_33901.html. This means emptying out the water butt and turning it on its side, then cleaning and drying the area around the cracks, both inside and out. Then cut out some strips of plastic from a milk bottle, coat liberally with silicone sealant, and stick to water butt, both on the inside and out. The theory is that the pressure of the water will hold the plastic in place on the inside. I don’t know whether the plastic on the outside helps with the current leak, but it may add some insulation against future frost damage, and so I thought I might as well put it on.

Water butt repair on the inside

Water butt repair on the inside


And here is what the butt looks like on the outside.
Water butt repair on the outside

Water butt repair on the outside

The silicone sealant I used is suitable for interior and exterior use, but is not meant to be permanently underwater, so I don’t know how long the repair will last. Given that the water butt will probably develop another leak in the next couple of years, I will be well satisfied if it lasts for two winters before I have to redo it. I used translucent sealant, which I think looks better than white or black, but I realise I am not going to get any marks for aesthetic appeal. I just want to not be sprayed with water every time I go past the water butt after it has been raining.

I will leave the water butt to dry for 24 hours, and then connect it up, and hope it works.

Note added 16 August 2012: This repair lasted for almost a year – today was the first day I noticed that the butt was dripping again. I am going to try the same method but using a sealant designed for underwater use. Search for “butt” in the blog if you want to find out how I got on.

\

Saturday 20 August 2011

Moving the marjoram

Filed under: Progress — Helen @ 5:04 pm

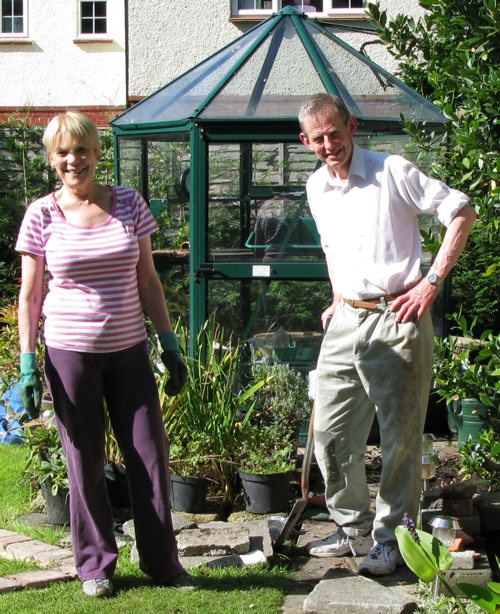
Today I brought in some additional labour to help prepare for the big planting project in the autumn.

Mum and Dad in marjoram moving mode

Mum and Dad in marjoram moving mode

The job was to move the marjoram from under the apple tree to another part of the garden. The reason is that I want to preserve the marjoram, because it is good ground cover, is unfussy about where it is put, smells gorgeous and is beloved by bees. I do not yet know where its eventual destination will be, but there is a patch behind the bay tree where it can quietly flourish, out of the way of the operations that will take place as soon as the apple tree has gone to sleep for the winter.

As there was a lot of marjoram under the apple tree, there was no way we were going to move it all. You can see from the picture below that there was still a lot left after we had decided we had done enough digging. You can also see how prolific the apple tree is – for its size, those are amazingly big and plentiful apples.

The remaining marjoram under the Charles Ross apple tree

The remaining marjoram under the Charles Ross apple tree

Mum and I trimmed the marjoram right back – sorry bees – and dug it up in several spadefuls, while Dad dug some holes in its new home, correctly watering the holes before planting. There should still be enough summer left for the marjoram to establish itself behind the bay tree. It won’t mind being in the shade.

Dad and newly-planted marjoram

Dad and newly-planted marjoram

Next, I will dig up the rest of the marjoram and the other plants under the apple trees, and compost them, but there is no hurry to do this. Just as well, because I think I am going to be very busy preparing and freezing all those apples in a few weeks’ time.

\

Saturday 6 August 2011

Feedback from friends

Filed under: Front garden,Pond,Progress — Helen @ 4:34 pm

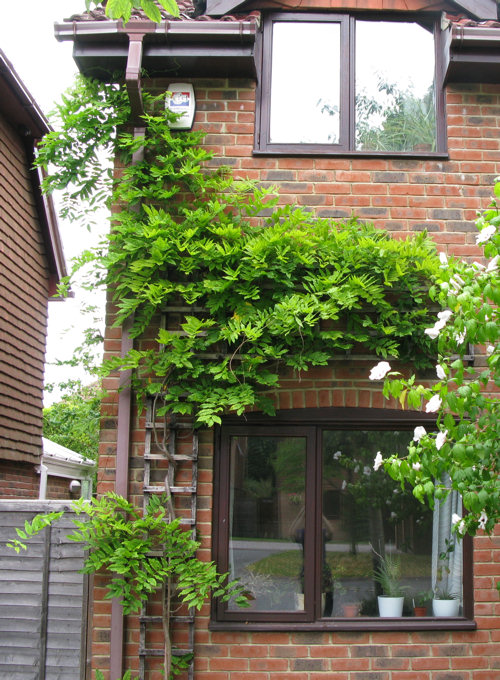
The wisteria is once again becoming wisterical.

The wisteria going wisterical, as usual

The wisteria going wisterical, as usual

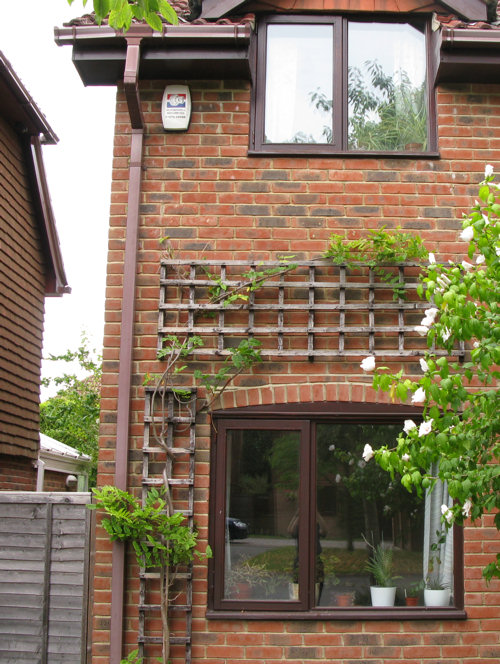
So I pruned it.

Wisteria less wisterical than before

Wisteria less wisterical than before

I know what the books say about pruning wisteria – you have to do it twice a year, in July/August and January, and you have to cut x amount off each soft traily bit leaving y leaves still on there, and then it flowers. These instructions are clearly written by people without burglar alarm boxes and drainpipes. The only pruning instruction that my wisteria understands is, “Cut off as much as you can without falling off the ladder”. I am still waiting for the part of the process where it flowers.

A kind friend said that in the recent Willowherb Elimination Stakes he was rooting for the willowherb, describing it as “attractive and the way the seeds unpeel is nice (and it is, of course, free and very low maintenance)”. Low maintenance is a good way of describing a plant that needs no encouragement. Maybe next year the willowherb and I will have come to an arrangement where we can live together in harmony.

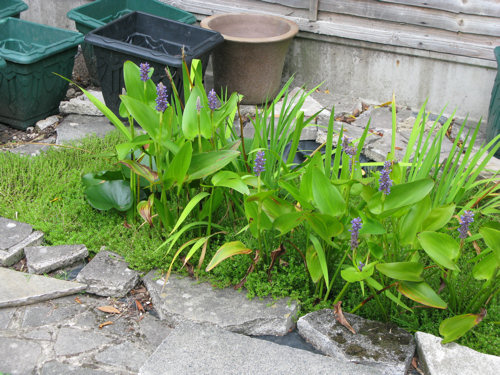
Another kind friend warned me that I had a demon in the Temporary Pond. I had noticed it had been getting somewhat overgrown, but I am used to having to pull out great handfuls of the pondweed from time to time.

Overgrown pond with pontederia cordata (nice plant) in flower

Overgrown pond with pontederia cordata (nice plant) in flower

She identified my demon as Crassula helmskii, aka New Zealand Pygmyweed. The RHS and other highly respected organisations have terrible things to say about it, mainly because it is an invasive non-native species. I have no idea whether this is the pondweed I originally bought in 1996 or whether it hitched a lift into my pond and took over from what I intended to have. However, in a small pond it requires little maintenance – just five minutes a month in the peak growing season to rip out a few handfuls and compost them after leaving them by the side of the pond for a few days for things to crawl out. And it IS a good oxygenator, and the pond has always been very healthy with the weed in it.

Crassula helmsii or New Zealand Pygmyweed

Crassula helmsii or New Zealand Pygmyweed

So I am not going to attempt to eradicate the demon, but I may consider using a different type of pondweed if I ever get the two official ponds up and running.

I have been engaged in the pleasurable but demanding task of eating all the Discovery apples before they go off – they do not store well. I don’t know what they are like when cooked, but it seems a waste to cook them when they taste so divine raw. After I’ve finished with them, I have Charles Ross to contend with. It is a shame that both my apple trees have chosen odd years to bear their maximum fruit load, but perhaps when I move them, one of them will be upset enough to start producing in even years.

And finally… I notice that WordPress is now inserting pictures where I want them, instead of automatically putting them at the beginning of the article and expecting me to cut and paste them. I do not know whether this is because I have a new version of WordPress or because I sacked Internet Explorer 9 (it’s unbelievably slow and crashes even more often than Internet Explorer 8, which is saying something) and installed Google Chrome.

\
« Previous PageNext Page »