Helen's Garden Renovation Project

Friday 10 April 2009

Fun with tree stumps

Filed under: Progress — Helen @ 1:31 pm

Progress has slowed down now. This is partly because the run of good weather has stopped, and partly because I am now at the peak time for the tutoring business. Business has been quiet since September, probably because of the recession, but now there is a sudden increase in demand and I have to do my best to meet it until it all goes quiet again on 1st June (this is the date of the second GCSE maths paper). In an attempt to make up for the lack of demand for tuition in January, I have been working extra hours at the day job, and this also takes time away from the garden.

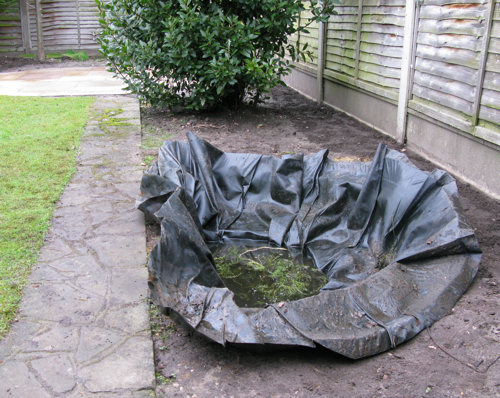
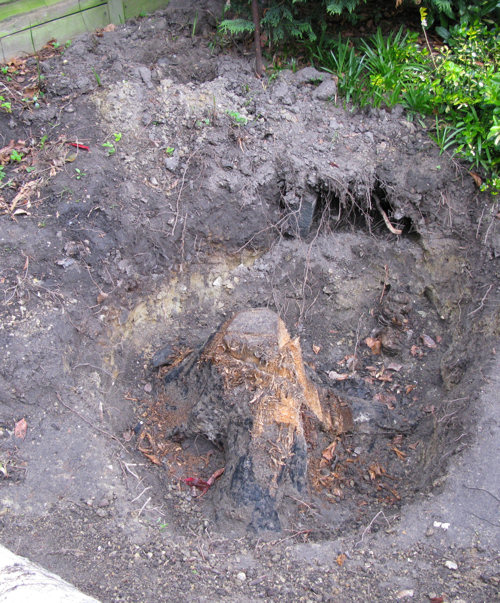
I have removed a good quantity of rubble, mainly breezeblocks, from the old pond area. I have also found a tree stump, which was under the pond shelf. I could leave the stump there, as it will be a few inches below the soil surface and I could work around it when it comes to planting the area, but I would rather do a proper job and get rid of it. The stump is well-rotted and has a black coal-like coating, as would be expected after twelve and a half years of it being squashed under a weight of water. However, it’s still quite a task to remove it. I started sawing bits off, but it was very hard to do this because the wood was soft and full of yukky rotten tree sap.

The tree stump before I started smashing it with a mattock

The tree stump before I started smashing it with a mattock

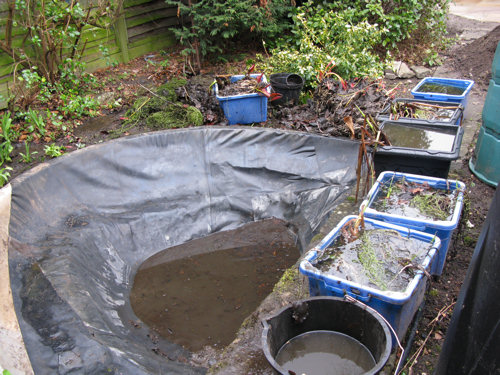
So I bought a mattock. It’s called a “grubbing mattock” and it looks like a pickaxe, except the blades are flat and wide instead of being pointy. Then I started bashing the tree stump. This was not a fast process either, partly because the tree stump is quite big, and probably partly because I am probably not very good at this (although I can say that I was pretty good at breaking up the path foundations with the pickaxe). Progress can be measured by the full blue box of tree stump splinters at the top of the photograph.

The tree stump after I started smashing it with a mattock

The tree stump after I started smashing it with a mattock

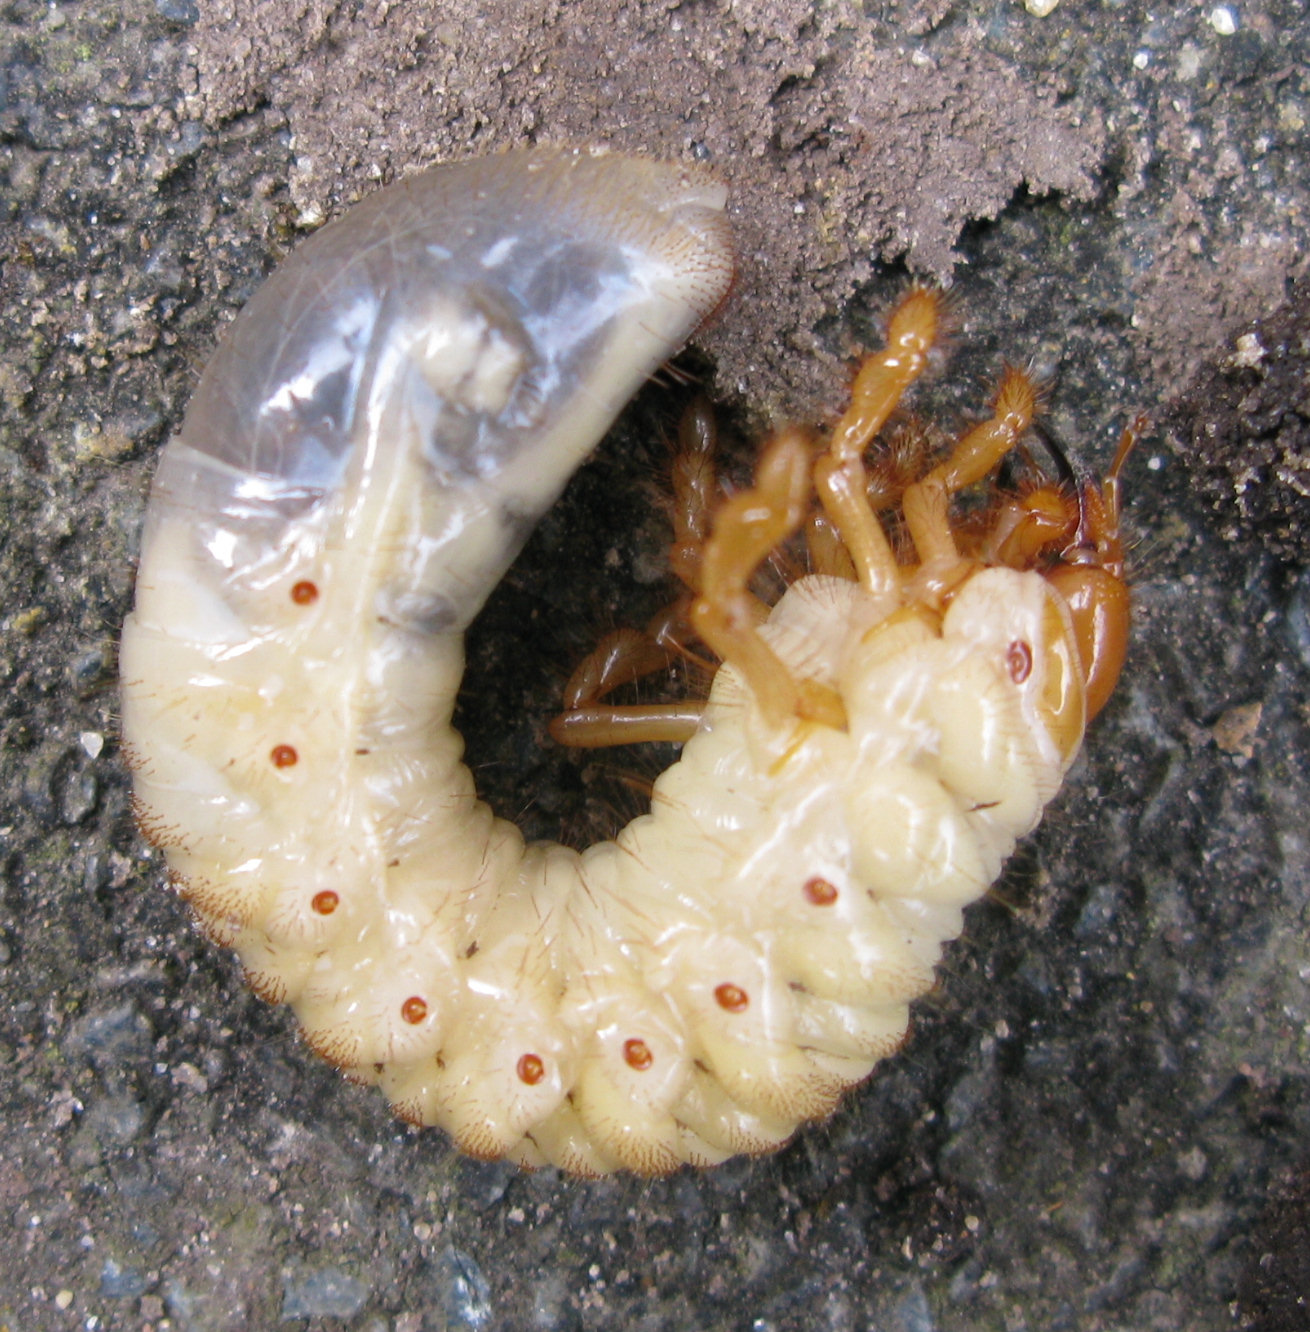
I have a few other things to report. While I was digging out the rubble a week or two ago, I found two grubs which looked like this.

White grub, probably nasty chafer grub

White grub, probably nasty chafer grub

At first I thought it was a horrible vine weevil maggot, but I realised it was far too big, and also it had legs, which I don’t think vine weevil maggots do. I decided it probably wasn’t anything I wanted, so I left it on the path for a bird to eat. Then I looked it up on the internet and found it was probably a chafer grub. These creatures are bad for lawns, but I don’t think getting eaten by chafer grubs is the worst problem my lawn is facing at the moment, so I am not worried. (My main lawn problem is too much moss, but I am not going to do anything about that because I am going to dig the whole thing up and start again with seed).

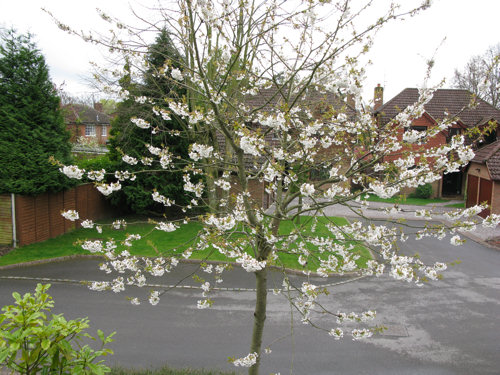
I am very pleased with the cherry tree in my front garden this year. I like to think that the improvement is due to my hard work two years ago, when I dug out a few hundredweight of rubble from under its roots. It’s just as likely that it has benefitted from two wet summers. Anyway, this is a vast improvement on this time two years ago.
Cheery cherry tree in April 2009

Cheery cherry tree in April 2009

\

Saturday 21 March 2009

Continuing to decommission the pond

Filed under: Greenhouse,Progress — Helen @ 4:54 pm

I have spent two sessions since the last post breaking up the path in front of the pond, removing the underlay for the pond liner and breaking up the edge of the pond. I managed to remove all the paving slabs quite easily, but most of the foundation of the pond was solid concrete, which I broke up with a pickaxe. This was quite easy, really. It is absolutely essential to wear eye protection for this job. It is also highly advisable to keep your mouth shut, however much the exertion may make you want to breathe through your mouth. I used the pickaxe to make a line of indentations at right angles to the path edge and eventually a section would break off. It is important to work out how much you can lift, and break the concrete up into sections that are not too heavy.

Me sitting in the pond

Me sitting in the pond

I pulled away the remaining underlay and put it on top of various earth piles, where it will provide the useful function of deterring cats who want to increase the organic content of my soil. I also dug a little deeper right at the bottom of the hole so I could bury a very heavy kerbstone that I dug up from the shrub patch next to my house when the Residents planted things last April. The kerbstone was too heavy for me to lift safely so I didn’t want to try and take it to the dump.

I have started to remove one of the tree stumps that was left in place when the pond was dug. It has flaked off into small pieces, which I am putting in my compost heap. I think there are more tree stumps in the area. There is also a great deal of rubble, and the soil directly under the path is poor quality subsoil, not topsoil as I had hoped. I think I am going to end up with too much subsoil and not enough topsoil. As I have no intention of paying to have the subsoil taken away and replaced with topsoil, I am going to have to convert the subsoil to topsoil. I am not sure whether this is actually possible, but I found an article here that said it was: http://www.suite101.com/article.cfm/shade_gardening/714. I think I just have to remove the rubble and any large stones and add some compost or soil improver. I am not going to add any sand because my subsoil is sandy enough.

I am seriously considering whether to keep my temporary pond. Over the past few days I have enjoyed the activity that I can see from my kitchen window while doing the washing up. A thrush has been pulling out bits of plant, presumably to make a nest with. Maybe I will put in a small moulded pond where the temporary pond is now, when the real pond has been dug.

I rang up the greenhouse installer and told him the window wouldn’t fasten shut, and he said I should give it a shake and then try again. So I gave it a shake, and it was a little nearer to being fastenable, and then another shake, and then a few more, and then I could fasten it. I’m not convinced the fasteners are really in the right place, but there don’t seem to be any gaps when the window is closed, which is the important thing.

It is possible that the newts that I transferred from the old pond to my plastic buckets may have died because the water got too cold overnight. There was a smaller volume of water in the buckets than in the pond, so it would have got colder more quickly. Although the newts could get out, they may not have realised in time that they were getting too cold. It was a shame that they died, but I have found plenty more around the old pond, so the population is not in danger.

\

Monday 16 March 2009

Greenhouse Day

Filed under: Greenhouse,Progress — Helen @ 5:34 pm

Today the men came to erect the greenhouse.

The new greenhouse

The new greenhouse


They did it very quickly and I think it looks as beautiful as I had hoped. They gave me some top tips for being nice to greenhouses: (1) if you leave the door open, make sure you fasten it open with the metal stay because if it bangs it will break the glass and distort the frame; (2) if it snows, get the snow off the roof.

I would add a third Top Tip for greenhouse installation: the installers may leave the door and window open to allow the smell of mastic to dissipate. Before the installers leave, try closing the door and window. I did not do this, and I have found that the window will close, but the stay is misaligned, which means that only one of the prongs fits into a hole. I’m not sure this matters because the window is quite tightly closed, but I should have checked. The door closes, but only just. I will try applying some Free and Easy from Lakeland, which has worked wonders on my sliding bookcase doors.

Anyway, it is done now, and I just need some electricity and then I can start playing with the greenhouse.

I gave my plants their first dose of Wilkinson’s plant food. I also gave all the acid-loving plants some granules. Then I took up some more of the path by the original pond and put it around the temporary pond to make a sort-of decorative border. I also pulled out some of the underlining and put it next to the temporary pond. I am going to use these areas to deposit rubble when I destroy the paths and the original pond.

Temporary pond and rubble depositing areas

Temporary pond and rubble depositing areas

I found some more sleeping newts under the under-lining.

Hibernating newts under pond liner

Hibernating newts under pond liner

I peeled away enough of the under-lining to see what had caused the pond to sink. I found that great gaping holes had appeared above the disused soakaway. I will have to excavate properly and fill them in, so it is a good thing that I have too much subsoil. Also I am a bit worried about the foundations of the path that runs in front of the pond. I think they might be a bit solid, which means I may have trouble removing them. However, I do have a pickaxe. And the tree stump, which Lotus Landscapes left under the path twelve years ago because it was too heavy to remove, is not going to give me a lot of trouble. I bashed it lightly with a spade and it started flaking away. Unfortunately I haven’t left it there long enough for it to turn into coal, but I can put the rotted remains into my compost heap.

\

Sunday 15 March 2009

First day of spring

Filed under: Brimstone butterfly,Progress — Helen @ 2:43 pm

Today is the first day of spring because I saw a brimstone butterfly. I didn’t have my glasses on at the time, but it definitely was one. This gives me an excuse to use the picture that my friend Sharon kindly sent me last year.

Brimstone butterfly

Brimstone butterfly

I continued with my pond transfer, and unfortunately the news here wasn’t so good. When I tipped out my buckets of plants, newts, snails and pond water into the temporary pond, I found that several of the newts appeared to have died. I have no idea why. I wondered if I might have physically damaged them in getting them out of the pond, but they didn’t look injured. I have a small hope that the shock may have put them back into hibernation and perhaps they are not dead, just resting, but I think they are dead really. I put them into my current compost bin, which has only a small amount of plant matter in it, so they will be safe from predators if they do wake up, and can easily crawl out if they are so minded. And if they are dead then they can contribute to the garden lifecycle.

I was going to repot the plants, but I decided it was too cold to be messing about with pond water unnecessarily, so I put the ones that were already in baskets into the temporary pond, and I put the ones that had escaped from their baskets into ordinary plant pots and put them in the temporary pond too. I will try and do something with them in July or August. I think I will have to buy some more pond baskets – big ones. I may also buy a different water lily. The one I have is so vigorous it’s a liability.

I started to take up the path that runs along the straight edge of the old pond. This is quite an easy job as some of the slabs were already loose. I used a crowbar to lever some of them up, but some of them were so loose that I could just pick them up off the ground. I put the slabs around the edge of the temporary pond so they can hold down the edge of the liner and make the pond look slightly pretty. Under one of the slabs I found two newts fast asleep, but it must be spring; the brimstone butterfly says so. So I put them near the temporary pond so that they can wake up and get in it as soon as possible.

\

Friday 13 March 2009

Pond Life

Filed under: Progress — Helen @ 3:39 pm

The weather is getting warmer. This was a good thing, because today was the day for emptying out my old pond. I have been digging the new, temporary pond over the past few weeks. The reason for making a temporary pond is that I want to get the final pond built and the edging around the lawn laid in one operation. This requires filling in the original pond – but I want to take my time doing this, and meanwhile I don’t want the newts and plants to be homeless. The temporary pond is situated at the right hand side of the garden as you look from the house, and I don’t need to disturb this part of the garden until the final pond and lawn (which will be over to the left of the garden) have been constructed.

The old pond is in the far left-hand corner of the garden as you look at it from the house. It is behind my array of compost bins, which is why it hasn’t been in any of my photographs for a while. I emptied out the pond with buckets. I put the plants in several square containers and poured some of the water, through a sieve, into my spare blue recycling bin. I have this spare bin because when the Council started collecting waste from the recycling bin and the normal bin on alternate weeks instead of collecting them both every week, they reissued everyone with a bigger recycling bin. They told us to put out our old recycling bins if we wanted them collected, but I didn’t, because I knew mine would come in useful for keeping pond water in.

There was a lot more water than would go in my bin, so I distributed the rest around the garden. I thought it would be interesting to count the newts that I found in the pond, but then I gave up because there were so many. I didn’t find any frogs. The water lily (a “Rose-Magnolia”) had made an attempt to take over the immediate habitat and I couldn’t pull it out of the water, so I shoved it about until bits broke off under its own weight, and eventually reduced it to a size that I could lift. The other plants have been holding their own in the pond domination stakes, but were much more manageable.

When I had emptied out nearly all the water and sludge, I cut around the liner with a Stanley knife and pulled the liner out of the pond. Under the liner there is some underlay and some spare pieces of pond liner, so it looks as if the liner is still there, but it isn’t. The underlay shouldn’t be watertight, so the remaining water will eventually drain out of the pond.

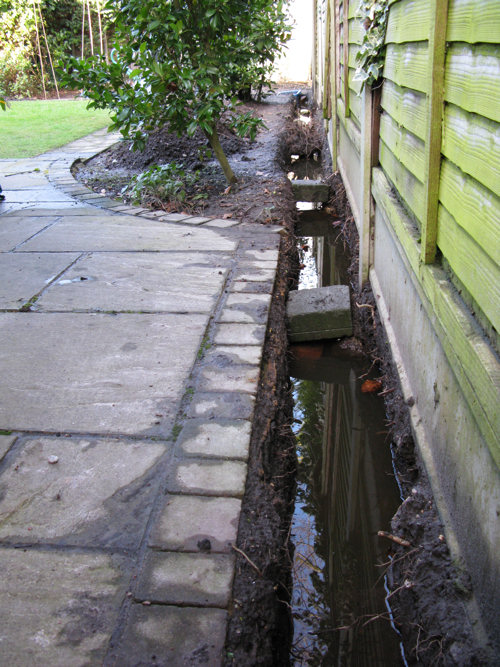
Emptied pond with liner removed but showing underlay

Emptied pond with liner removed but showing underlay

I dragged the liner over the lawn to the new hole and delicately arranged it in the hole. Well, all right, I didn’t because I was seriously tired by then after lifting all that water out of the old pond. I shoved it in and tried to make sure there was enough liner to come up to the top all the way around, and then started adding water from the recycling bin. I am not really concerned about the arrangement of the folds in the liner because the pond only has to keep going until about March 2010, or whenever it gets warm enough for me to bear to put my hand in and take the plants and water out.

Temporary pond with deepest part filled with water and pondweed

Temporary pond with deepest part filled with water and pondweed

I now need to repot the plants – my water lily, pontederia cordata and an Iris Laevigata “Midnight Blue” – and put them in the temporary pond. I also need to fill up the temporary pond, and I will use water from my water butts to do this. It won’t take long because the temporary pond is quite small. Then I can leave the temporary pond to its own devices until it is time to move the contents (including the newts) to the final pond.

\

Monday 2 March 2009

Greenhouse base laid

Filed under: Greenhouse,Progress — Helen @ 1:23 pm

The snow has stopped, the sun has occasionally come out, and progress has been happening. The base for the greenhouse was laid on Thursday 19th February. Here it is:

The greenhouse is a lot smaller than the base. I have measured it to have a border of 60 cm width all round it. The back right hand corner has not been cut off like the other ones because this is where I need access to the compost bins and therefore I will need to walk on that area. You can just about see the black armoured cable sticking out of it. This should come up just inside the greenhouse and then it can be wired up to a junction box and the other cabling can come out of there.

As you can see, the base looks very pretty and even more importantly, flat. However, I am not really sure about whether I did the right thing here. The problem is that the garden is not perfectly rectangular. The landscapers asked me whether I wanted it square to the back fence or the side fence, and we all agreed that it would be best to have it square to the side fence, since the back fence will eventually be hidden by the conifers. However, what I should have asked for was to have it square to the house. The leading edge is not quite parallel to the house, which means that it may be difficult to join up the base with the patio near the house without making it look wonky, and also that it may look crooked when I look out of the kitchen window at it while doing the washing up.

When the garden was designed, I decided that I wanted straight edges rather than curves. The advantages of straight edges are that they take better advantage of the space available and they are often easier to implement because there is less cutting of stone to do. However, the disadvantages are that everything has to be measured more precisely for it to work. And using sandstone rather than crazy paving accentuates the parallel (or supposedly parallel) lines even more.

Looking back on this project, there are a lot of things I would have done differently had I known what I do now. For a start, I would have laid the electric cable myself. There was no reason on earth why I shouldn’t have done that, and I would have been spared worrying about whether the fence would fall down. (Indeed, I think I might have dug a trench parallel to the fence but six or more feet away and very deep instead of alongside the fence). Also, I would have removed the existing crazy paving path where it met the edges of the patio base. Then I wouldn’t have the foundations of the existing path running into the foundations of the new base, and it would have been easier to remove them without interfering with the new foundations. And finally I may have even had the path to the greenhouse installed at the same time as doing the base so that I could be sure that everything would line up nicely.

However, it is done now, and I now have to move onto the next phase of the project. I have been drawing up a plan of all the things I have to do and I will post it here when I have finished thinking of things to put in it. For the time being, I am busy filling in the trench with topsoil. I have some subsoil left over because the landscapers put sand in the trench with the cable (good idea) and therefore there is not enough space to put all the subsoil back. So I am moving the subsoil out of the way, and eventually I will use it to fill in the existing pond. I am also not happy about the depth of the cable for the last bit of its journey to the fusebox – the landscapers did that bit – and so I shall dig that at least six inches deeper.

Meanwhile I am waiting for the greenhouse installer to phone me to confirm a date, and then I will get my electrician to wire up the cable for me. And then I can go and play in my greenhouse.

\

Thursday 12 February 2009

Unsolicited water feature

Filed under: Greenhouse,Progress — Helen @ 12:25 pm

After all the snow, the Met Office offered us some more snow, but we turned it down and had rain instead. A huge amount of rain. I had expected it to wash away all the snow, but it didn’t. There is still some left around the place, but not in my back garden. Thanks to the rain, I now have an interesting water feature:

My trench filled with water to make a tranquil channel by the fence

My trench filled with water to make a tranquil channel by the fence

We had some strong winds on Monday night and Tuesday morning. They were forecast well in advance and I shoved some extra buckets of soil and bits of rubble next to the posts. Fortunately the winds were easterly, or northeasterly and the fence stayed up. With luck, the fence only now has to manage to stay upright until 22 February, when the base is due to be laid and the trench can be filled in again. However, I don’t know how far behind the landscapers are with their other jobs after the snow.

\

Monday 2 February 2009

How much snow do we really need?

Filed under: Progress — Helen @ 5:36 pm

In my last post I was complaining about the rain. I have determinedly dug away despite the sogginess and although it’s harder work when the soil is wet, I have made very good progress. I have piled up the topsoil in the compost bins and round about that area, and heaped the subsoil on the bare strip between the trench and the path. So on Saturday I was doing quite well.

View of the trench on 31 January 2009

View of the trench on 31 January 2009


Then, today, this happens!
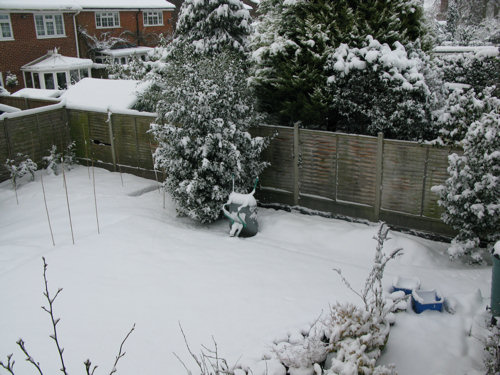
Garden covered with snow in February 2009

Garden covered with snow in February 2009


According to the BBC’s website, this is the most snow we’ve had since 1991. This is an overview of the trench in snow:
View of the trench in snow

View of the trench in snow


I have also started to worry about the safety of the fence. Both Yvonne (my garden designer) and Richard (from my landscaping company) have said that it is a good idea to dig the trench right next to the fence. However, if I dig next to the foundations of the fence posts, surely that will affect the stability of the fence? I want to dig deep to get the cable safely underground, but the deeper I dig, the more danger the fence is in.

I have thought about a few solutions. My dad suggests buying and laying the cable myself. Then I can dig and fill in the trench section by section, and be careful not to do any digging when it is windy. This might work but would cost me extra because I would have to buy the cable myself. A cable is cheaper than repairing the damage if the fence falls down, but I want to avoid as much extra expense as I can. I also thought about excavating near the fence posts but stuffing some assorted rubble in there, which can be removed when it is time to lay the cable. However, when I imagine the fence being blown down, I can’t see the rubble being much protection.

I asked for help from the forum at http://www.pavingexpert.com/ and as I write this, I am getting all sorts of good advice. I think the answer is going to be to not dig too deep, and bury some warning tape above the cable. I may be able to use ducting, which would provide some protection and thus allow me to get away with burying the cable less deeply. I can also put a sign up on the fence warning of an electric cable underneath. Obvious, but effective. And it needn’t be unsightly, as I can design one myself with a pretty picture and laminate it. I expect I’d have to replace it every couple of years as the weather took its toll on it, but that wouldn’t be a problem.

\

Thursday 22 January 2009

Not cold any more but wet

Filed under: Greenhouse,Progress — Helen @ 6:30 pm

The weather is just being plain unreasonable. As soon as it gets warm enough for me to get a spade into the ground, it starts pouring down. Nevertheless, things have been happening. For a start, my greenhouse was delivered on Wednesday 14 January. I was at work, but I left the garage unlocked. This is how much space it takes up:

The greenhouse, stored in the garage

The greenhouse, stored in the garage

The base is not getting laid until towards the end of February, but that doesn’t matter because it will give me plenty of time to dig my trench for the cable. I will it as deep as I can be bothered, which is unlikely to be more than 18 inches. The only thing I am worried about is whether, if I dig the soil away from one side of the concrete fence posts, the fence will blow down. I am hoping that the sheer weight of the concrete will hold it fast. Also, unlike the fence on the other side of the garden, it has never shown any signs of wanting to fall down in the past thirteen years, so perhaps it will be all right.

So far I have managed to dig the entire trench to a spade’s depth, and moved all the topsoil over to the area by the pond, which gets it out of the way. I am now excavating deeper, and heaping the subsoil by the trench, so that when I fill it in, I can put the subsoil back in it first. We had two dry days – Tuesday and Wednesday – when I was at work during daylight hours, and then it poured with rain last night and this morning. In the afternoon the sun came out, but of course the ground was still very soggy. I checked the Met Office website, and there is a severe weather warning out for heavy rain this evening, so I decided I had better put in a stint of digging. I put in an hour just before it started to get dark, at about half past four. Because I have sandy soil, it is not waterlogged, but the soil is heavier when wet, so I can’t do as much without getting tired. But at least I did something. We have unsettled weather forecast for the next few days, but perhaps I will be able to continue on Monday.

One of my neighbours came and looked at my damaged fence (see last entry) and thought that it was done by an intruder climbing over the fence. Sadly, I think she is right. Although I had thought the damage must have been done from the other side of the fence because the splinters are on my side, the splinters could also have landed there if someone’s foot pressed down on the wood while heaving themselves onto the shed roof. I’m glad I have chosen toughened glass for my greenhouse if people are going to come into my garden at night and climb on things.

\

Friday 9 January 2009

Frozen solid

Filed under: Greenhouse,Progress — Helen @ 5:10 pm

We have had the most amazing spell of cold weather. I can’t remember when it last was this cold for so long. The Met Office has been giving us severe weather warnings and the government will make extra payments to pensioners because the weather is so cold. Until 22nd December, the Met Office stuck to its story that it will be a warmer than average winter, but now it’ll have to be about twenty degrees all through February if that’s going to happen, so they’re claiming we’re going to have below average temperatures in January and near average in February.

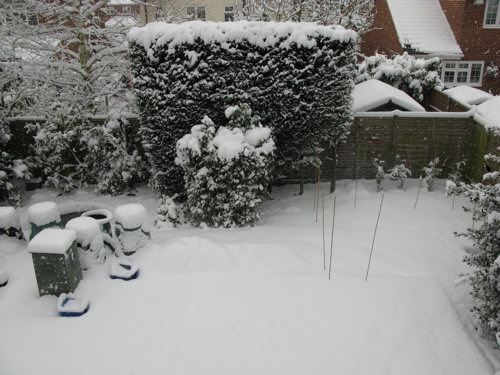
I haven’t even been tidying up the garden because it has been too cold, but fortunately I got a lot of tidying up done in November. Here is a picture taken from an upstairs window. It shows nearly the entire width of the garden – there’s just a bit missing on the left. The white blobs are sleet – something that we have had quite a lot of recently.

Overview of garden in January 2009

Overview of garden in January 2009

Progress has been happening – my greenhouse is to be delivered next week. I have got a quote from my usual landscaping company for laying a base for the greenhouse. I am going to deviate from the plan and extend the solid paving around the back and sides instead of having stepping stones, because I think it will be more practical and easy to maintain. It will also be more expensive, but I think it will be worth it. My landscaping contractors will lay the cable from the greenhouse to the house, and then I just have to get an electrician to wire it up to a spur in the kitchen. The landscaper recommends burying the cable to a depth of one foot, so that’s not as much digging as I had thought. However, I intend to dig the trench deeper than that if I can be bothered and if weather permits.

Today I went out into the garden for the first time since before Christmas, apart from to empty the compost bowl. I swept the garage in preparation for the arrival of the greenhouse, and as an experiment, tried to dig a bit more of the trench. I found that once I had cracked the frozen inch or so at the surface, it was quite easy to dig out the soil, so that’s quite good news. I also think I am acclimatising to the extreme cold. Although my fingers went slightly numb, it wasn’t too bad – and I know it was still cold because there was ice and frost on the ground, and my pond was frozen over (although I found that the ice wasn’t thick enough for me to skate on).

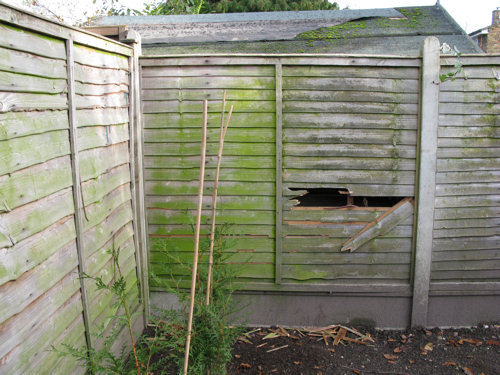
My fence has been damaged.

Fence damaged by unknown assailant

Fence damaged by unknown assailant

It looks as if the damage was done by something from next door’s garden. It’s a bit puzzling, because I would have thought an animal would have attacked the fence a bit lower down. Next door’s shed (you can see the roof of it behind the fence) is only about six inches from my fence, so it must be a long, thin animal. Maybe the fence was head-butted by a grass snake. The panel is replaceable, but for now I will repair it with some bits of wood over the gap.

\
« Previous PageNext Page »